You're probably staring at a spreadsheet that needs to make decisions for you.
Maybe you want Excel to mark deals as qualified or not qualified. Maybe you need to flag overdue projects, assign a commission tier, or return a simple status like Approved or Review Needed. In these situations, IF statements in Excel become useful. They let a worksheet react to the data instead of forcing you to scan rows manually.
A lot of people get stuck because formulas look like code. They aren't, at least not in the intimidating way one might imagine. An IF formula is just a short decision rule written in Excel's language. Once you understand that, the function becomes much less intimidating and much more practical.
Grasping the Core IF Statement Syntax
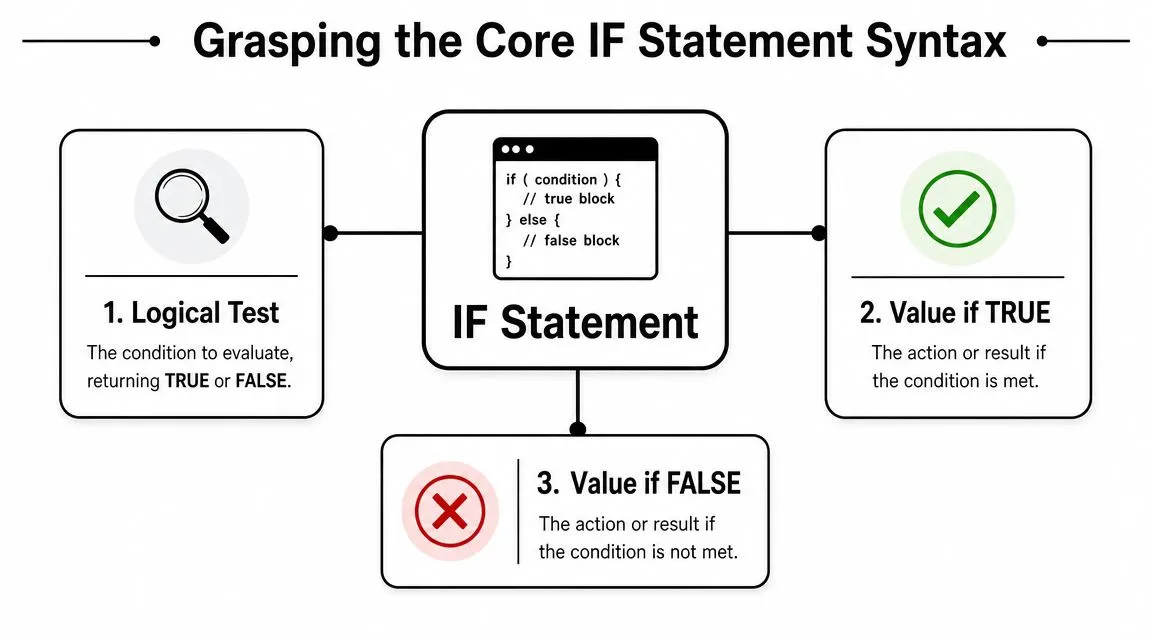
Microsoft documents the IF function as IF(logical_test, value_if_true, [value_if_false]), with the first two arguments required and the third optional in its Excel IF function documentation. That's the whole structure. Excel checks a condition, then returns one result if the condition passes and another if it doesn't.
Reading an IF formula like a sentence
Take this formula:
=IF(B2>=50,"Pass","Fail")
Read it in plain English like this:
- If the value in B2 is 50 or more
- return "Pass"
- otherwise return "Fail"
That's why IF works so well for business tasks. You can turn a policy, rule, or threshold into a formula.
Practical rule: If you can say the decision out loud in one sentence, you can usually write it as an IF formula.
Here's what each part means:
| Part | What it does | Example |
|---|---|---|
logical_test | The condition Excel checks | B2>=50 |
value_if_true | What Excel returns if the test passes | "Pass" |
value_if_false | What Excel returns if the test fails | "Fail" |
The pieces that confuse beginners
Most confusion comes from a few small details.
- Text needs quotation marks. If you want Excel to display words like
"Pass"or"Late", put them in quotes. - Numbers don't need quotation marks. If you want Excel to return
100, just write100. - Comparison operators matter. You'll often use
=,<>,<,>,<=, and>=. - Commas separate arguments. Each part of the IF formula sits between commas.
If you're learning Excel logic as part of a broader workflow, this Excel-focused AI training for spreadsheet users can help you practice these kinds of formulas faster.
A business example that feels more real
Suppose column C contains invoice totals, and your company reviews any invoice above a threshold. You could write:
=IF(C2>1000,"Review","Approved")
That formula gives each row a label instantly. No filtering. No manual tagging. No separate notes column.
One more detail matters. Another Excel guide explains that IF supports operators like =, <>, <, >, <=, and >=, and if you leave out the optional false argument, Excel returns FALSE by default, as summarized in this IONOS explanation of Excel IF statements.
So this formula:
=IF(C2>1000,"Review")
means “if C2 is above 1000, show Review, otherwise show FALSE.”
That's technically valid, but in most business sheets it looks messy. It's usually better to define both outcomes clearly.
Combining IF with AND and OR Functions
A single condition is useful, but real work usually involves more than one rule. Bonus eligibility, customer discounts, approval routing, and project escalation often depend on several conditions at the same time.
That's where AND and OR become helpful. They sit inside the logical_test part of IF.
Using AND for strict requirements
Say a sales rep earns a bonus only if they hit their target and they've been at the company long enough to qualify.
If:
- sales are in
B2 - months employed are in
C2
you could write:
=IF(AND(B2>=50000,C2>12),"Bonus Eligible","Not Eligible")
Excel reads the AND(...) part first. It asks whether both conditions are true.
If both are true, the IF formula returns Bonus Eligible. If either one fails, it returns Not Eligible.
This pattern is useful when a rule has zero flexibility. Finance teams use it for approvals. HR teams use it for benefit eligibility. Operations teams use it for SLA checks.
How to build it without getting lost
Many people try to type the whole formula at once and then spend time hunting for a missing parenthesis. A cleaner approach is to build the test first.
Start with:
=AND(B2>=50000,C2>12)
If that returns TRUE or FALSE correctly, wrap it in IF:
=IF(AND(B2>=50000,C2>12),"Bonus Eligible","Not Eligible")
Build the logic first. Then attach the labels. That cuts down a lot of formula errors.
Here are two common mistakes to avoid:
- Mixing up text and numbers.
"50000"is text.50000is a number. - Forgetting that AND requires every condition to pass. One false result makes the whole AND test false.
Using OR when either condition is enough
OR works differently. It returns true if at least one condition is true.
Suppose a customer gets a discount if they're a new member or they have a valid coupon code. If membership status is in D2 and coupon status is in E2, you might use:
=IF(OR(D2="New",E2="YES"),"Discount","Standard Price")
That formula is flexible by design. A new customer qualifies even without a coupon. A returning customer can still qualify if they have one.
Here's a quick comparison:
| Function | Meaning | Business use |
|---|---|---|
AND | Every condition must be true | Bonus eligibility, compliance checks |
OR | At least one condition must be true | Discounts, exception handling |
A combined business scenario
You can also combine them.
For example, mark a project for escalation if it's late and either high value or client-facing:
=IF(AND(F2="Late",OR(G2="High Value",H2="Client Facing")),"Escalate","Monitor")
That's the point where if statements Excel users learn first start becoming powerful. You stop thinking in terms of “one cell equals one answer” and start thinking in terms of business rules.
Handling Multiple Outcomes with Nested IF and IFS
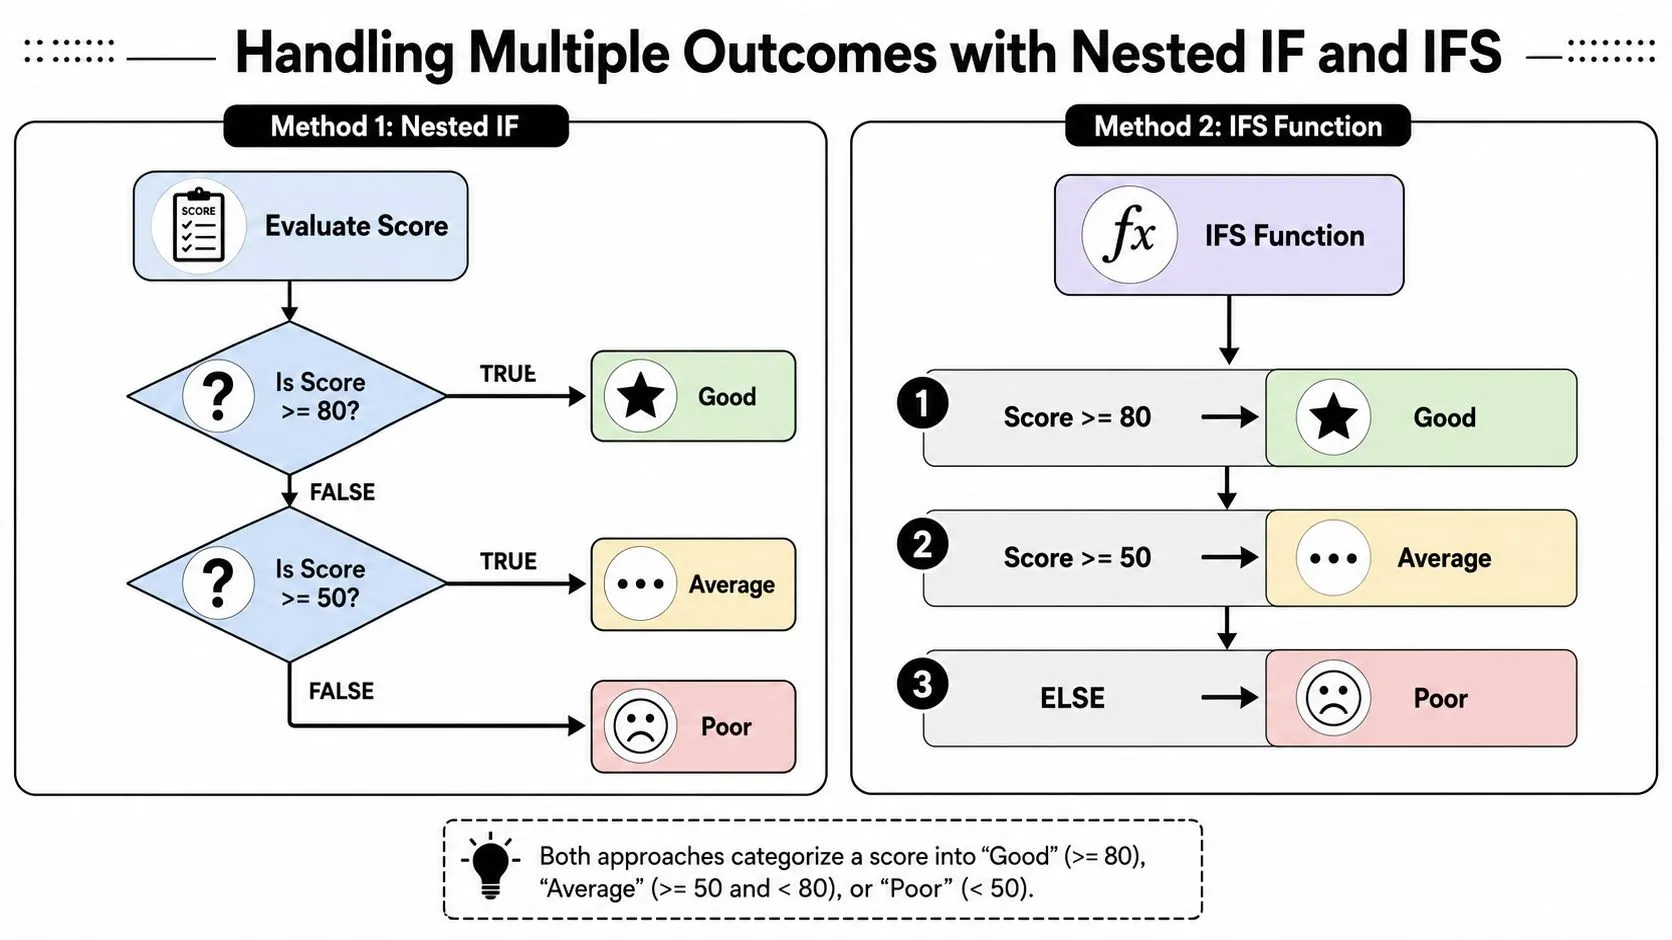
Two outcomes are easy. Real spreadsheets often need three, four, or more. A score might need to return A, B, C, or D. A project might need On Track, At Risk, Delayed, or Closed. A rep's sales could fall into several commission bands.
The older way to handle that is a nested IF, where one IF sits inside another.
What nested IF looks like
Suppose scores are in B2, and you want:
- A for 80 or above
- B for 50 or above
- C for anything below 50
A nested IF version looks like this:
=IF(B2>=80,"A",IF(B2>=50,"B","C"))
This works. Excel checks the first condition. If it fails, it moves into the second IF.
For small decision trees, nested IF is fine. For larger ones, it becomes hard to read quickly. The closing parentheses pile up, and editing one rule can break another.
The formula isn't wrong just because it works. If it's hard to read next month, it's already costing you time.
Why IFS is cleaner
A statistical Excel reference notes that Excel 2019 introduced the IFS function to simplify formulas that otherwise required nested IF statements, helping with formulas that became difficult to read as conditions multiplied, as described in this overview of statistical IF functions.
That same grading example becomes:
=IFS(B2>=80,"A",B2>=50,"B",TRUE,"C")
This format is easier to scan because each condition-result pair appears in sequence.
You don't have to mentally trace where one IF ends and another starts. You just read downward through the logic.
Here's the side-by-side comparison:
| Approach | Formula style | Best use |
|---|---|---|
| Nested IF | One IF inside another | Small multi-step rules |
| IFS | Condition-result pairs in order | Cleaner multi-outcome logic |
A short walkthrough can help if you want to see this visually:
A project status example
Say due status in C2 should return:
- On Track if the value is below 70
- At Risk if it's 70 or above
- Critical if it's 90 or above
Nested IF:
=IF(C2>=90,"Critical",IF(C2>=70,"At Risk","On Track"))
IFS:
=IFS(C2>=90,"Critical",C2>=70,"At Risk",TRUE,"On Track")
Both formulas work. The IFS version is easier to maintain because the conditions line up in a predictable order.
A simple rule for choosing
Use nested IF when:
- you only have a small number of branches
- you're working in an older workbook
- the logic is short enough to verify at a glance
Use IFS when:
- you have several outcomes
- another person will inherit the file
- the formula needs to stay readable during updates
If your formula starts looking like a paragraph, stop and ask whether IF is still the right tool.
When to Choose VLOOKUP or XLOOKUP Over IF
A lot of spreadsheet problems look like logic problems when they're really lookup problems.
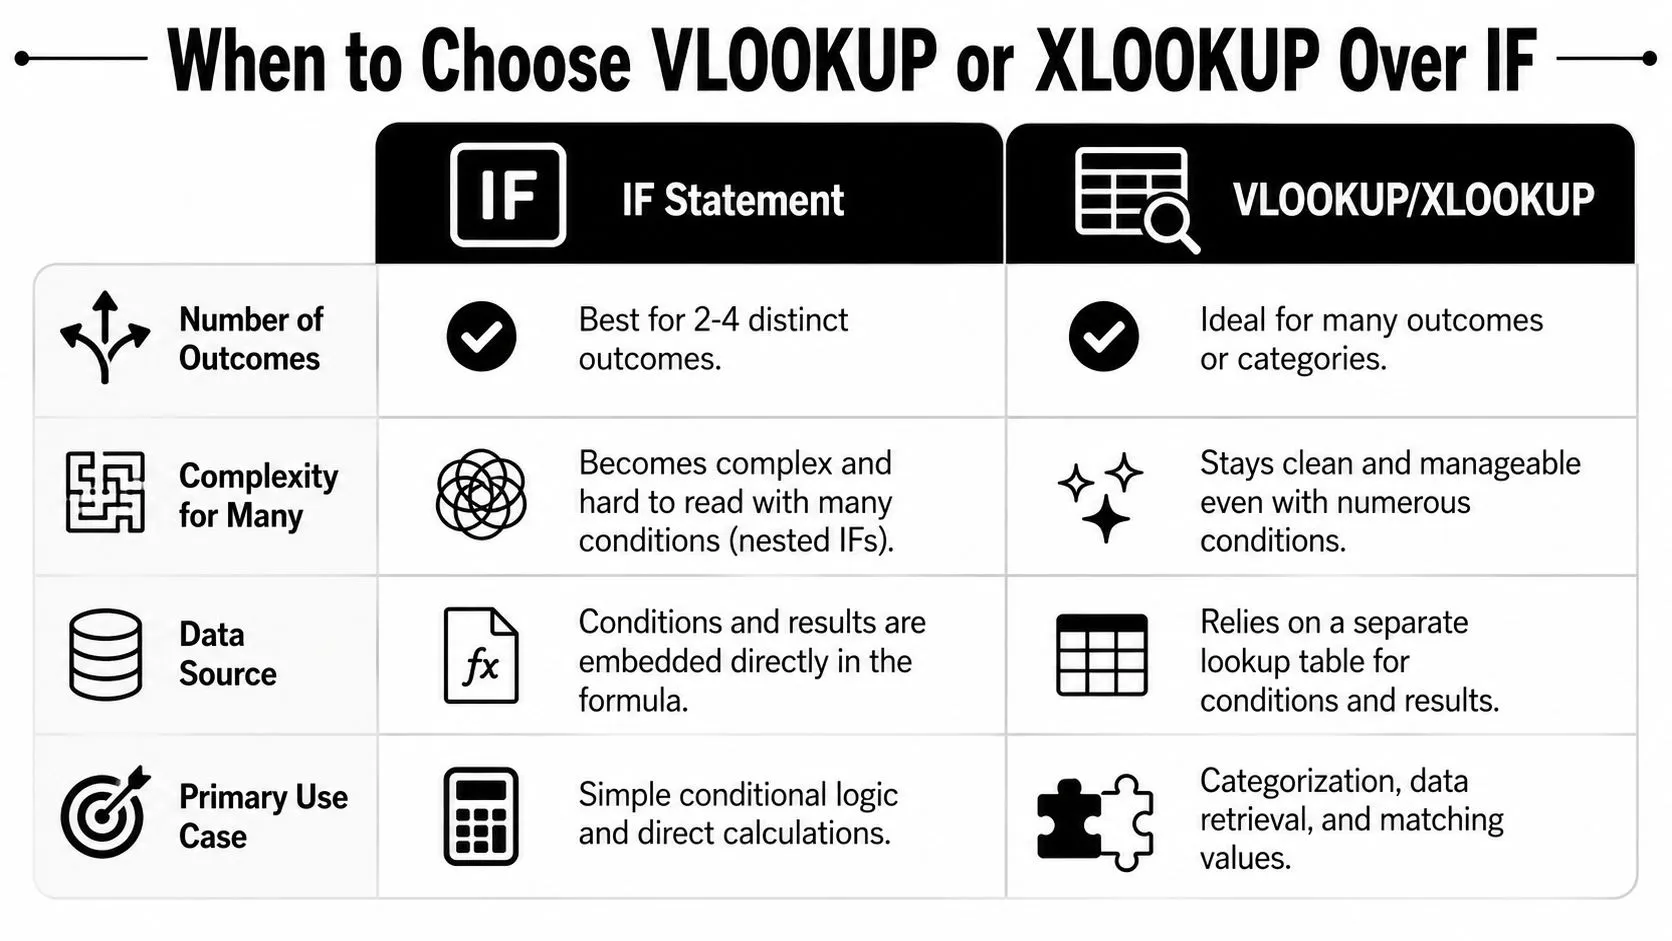
That distinction matters. If you're assigning a region based on a state code, mapping a product ID to a category, or matching a job title to a department, writing a long IF or IFS formula is usually the awkward way to solve it.
Microsoft explicitly notes that complex IF formulas can often be simplified with IFS, and that in most cases VLOOKUP can replace a complex IF formula, as explained in its guidance on nested formulas and avoiding IF pitfalls.
A classic example where IF becomes a mess
Suppose column A contains state codes and you need to assign a sales region.
You could write something like this with nested IFs:
=IF(A2="CA","West",IF(A2="WA","West",IF(A2="TX","South",IF(A2="FL","South","Other"))))
That's manageable for a few states. It gets ugly fast when the list grows. Adding a new mapping means editing the formula itself, which increases the chance of mistakes.
A lookup table is cleaner.
| State | Region |
|---|---|
| CA | West |
| WA | West |
| TX | South |
| FL | South |
Then use XLOOKUP:
=XLOOKUP(A2,$H$2:$H$5,$I$2:$I$5,"Other")
Or VLOOKUP if that's what your workbook supports:
=VLOOKUP(A2,$H$2:$I$5,2,FALSE)
The difference is practical. To add a new state, you add a row to the table. You don't rewrite logic.
Choosing the right conditional formula
| Function | Best For | Readability | Maintenance |
|---|---|---|---|
| IF | Two-outcome decisions and direct rule checks | Good when short | Easy when simple |
| IFS | Several ordered outcomes | Better than nested IF | Easier to revise |
| VLOOKUP or XLOOKUP | Matching a value to a result from a table | Clean for long lists | Best when mappings change often |
If you want more lookup examples you can adapt quickly, these ChatGPT prompts for VLOOKUP workflows are useful for turning plain-English tasks into working spreadsheet formulas.
A professional rule of thumb
Use IF when you're evaluating a rule.
Use XLOOKUP or VLOOKUP when you're matching against a list.
That sounds simple, but it prevents a lot of bloated formulas.
If the answer already exists in a table somewhere, use a lookup. Don't hard-code the table into the formula.
Where IFERROR fits in
There's one more tool worth using around IF and lookup formulas: IFERROR.
Suppose your lookup may fail because a code is missing. Instead of showing #N/A, you can return a cleaner message:
=IFERROR(XLOOKUP(A2,$H$2:$H$5,$I$2:$I$5),"Check Code")
That doesn't replace good data hygiene, but it does make the worksheet easier for colleagues to use. A manager reading a dashboard usually understands Check Code faster than #N/A.
For many business sheets, the most maintainable approach is:
- Keep your rules short.
- Move long mappings into tables.
- Wrap user-facing formulas with IFERROR when needed.
That's usually the difference between a workbook that survives one month and one that keeps working after handoffs, edits, and new categories.
Practical IF Formula Templates for Common Workflows
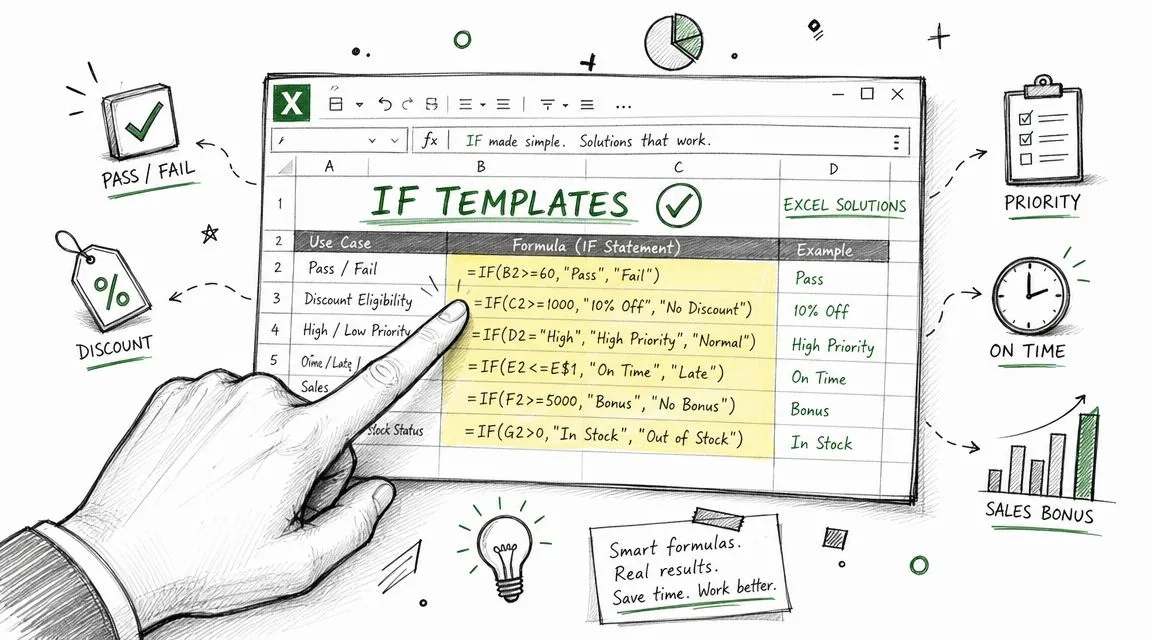
Rather than more theory, the utility lies in formulas that can be pasted into a file and adjusted.
That's where if statements Excel users rely on become valuable. They automate small decisions that repeat across dozens or hundreds of rows. A project manager stops reviewing dates manually. A sales lead stops assigning tiers by hand. A support team stops debating ticket urgency one row at a time.
Project status flagging
A common operations problem is turning deadlines into status labels.
Assume:
- due date is in
B2 - completion status is in
C2
Use:
=IF(C2="Complete","Complete",IF(B2<TODAY(),"Overdue",IF(B2<=TODAY()+7,"At Risk","On Track")))
How it works:
- If the task is already complete, Excel returns Complete
- If not complete and the due date has passed, it returns Overdue
- If the due date is close, it returns At Risk
- Otherwise, it returns On Track
This is useful in project trackers because the sheet updates itself as the date changes.
Sales commission tiering
Commission logic often starts simple and then grows. IFS keeps it readable.
Assume sales amount is in D2:
=IFS(D2<10000,D2*0.05,D2<20000,D2*0.075,TRUE,D2*0.10)
This formula applies one rate to lower sales, a different rate to the middle tier, and another to the highest tier.
If you prefer labels before calculating payout, use:
=IFS(D2<10000,"Tier 1",D2<20000,"Tier 2",TRUE,"Tier 3")
Then calculate the payout in a separate column. That's often easier to audit.
If you use AI tools to draft or troubleshoot formulas like this, these formula-writing prompt templates can save time when you need a quick first draft.
Support ticket prioritization
Support teams often need to combine issue type with customer level.
Assume:
- issue type is in
E2 - subscription level is in
F2
Use:
=IF(AND(E2="Outage",F2="Enterprise"),"High",IF(OR(E2="Outage",F2="Enterprise"),"Medium","Low"))
This returns:
- High for an outage affecting an enterprise account
- Medium if only one of those factors is true
- Low for everything else
That's a practical example of combining IF with AND and OR in one business rule.
Don't aim for the cleverest formula. Aim for the formula your teammate can still trust after opening the workbook on a stressful Monday morning.
A quick adaptation checklist
Before you paste any template into your own workbook, check these items:
- Cell references: Make sure
B2,C2, or other references match your actual columns. - Text values: Keep labels exactly consistent.
"Complete"and"complete"may not behave the way you expect in a messy dataset. - Dates and numbers: Confirm Excel is treating them as real dates or numbers, not text.
- Logic order: For IFS and nested IF, put the most restrictive or highest-priority condition first when appropriate.
These small checks prevent most formula headaches.
AI Academy by Techpresso is a practical place to learn the AI skills that make spreadsheet work faster, from formula drafting to reporting workflows and automation. If you want short, job-focused lessons instead of bloated courses, explore AI Academy.