You've probably got a browser full of tabs right now. One tab compares drawing tablets. Another argues about Krita versus Photoshop. A third shows a gorgeous speedpaint that makes digital art look effortless, while your own screen still feels like a mystery.
That's a normal place to start.
Digital art for beginners often gets framed as either highly technical or highly artistic. In practice, it's neither at first. It's a set of learnable habits. You need a workable setup, a few core concepts, and one repeatable workflow you can trust. After that, improvement stops feeling random.
AI can help here too. Not as a substitute for observation, taste, or drawing skill, but as an assistant. It can help you brainstorm ideas, test palette directions, and mock up finished work faster, which is useful when you're learning and don't want to waste energy on every small decision.
Choosing Your First Digital Art Tools
Most beginners get stuck before they draw a single line. The problem isn't a lack of motivation. It's too many options. Tablets, iPads, pen displays, free apps, subscriptions, brush packs, screen protectors. It's easy to think one wrong purchase will ruin the whole experience.
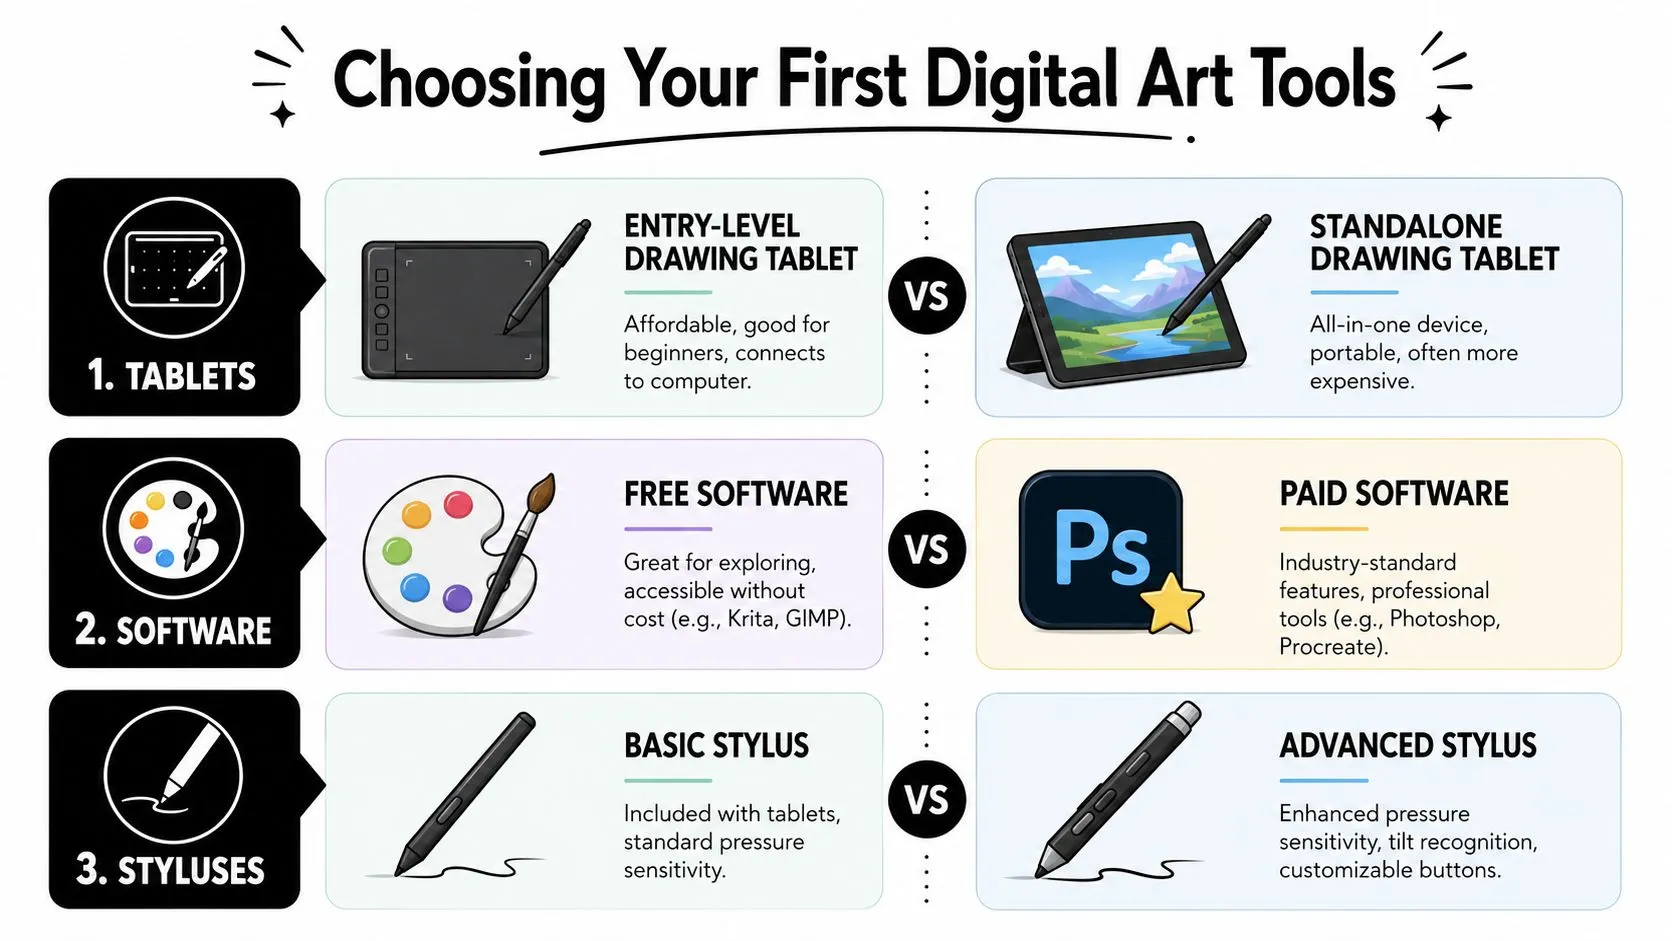
A simpler way to think about it is this. You're making three choices: hardware, software, and budget. Once those line up, you can start.
Start with the device you can actually use
For digital art for beginners, the “best” hardware is usually the one that removes excuses. If you already have a laptop or desktop, a basic pen tablet is often the least complicated entry point. You draw on the tablet while looking at your monitor. That hand-eye mismatch feels odd for a few sessions, then users adapt.
A pen display feels more natural because you draw directly on the screen. A standalone tablet can feel even more approachable because it keeps everything in one place. The tradeoff is cost. Clip Studio Paint notes that startup costs can range from a free application plus a small pen tablet at around $100 to a computer setup costing $450–$2,800 and a pen tablet costing $100–$2,000+ in its beginner setup guide on starting digital art affordably.
Practical rule: Buy for consistency, not fantasy. A simple setup you use every week will teach you more than an advanced one you keep researching.
Pick software that removes friction
You do not need to commit to one permanent app on day one. You need one app that makes it easy to sketch, erase, use layers, and export a file without confusion.
Coursera's overview of beginner tools, referenced in the same Clip Studio Paint resource above, includes Adobe Photoshop, Adobe Fresco, Adobe Illustrator, Krita, FireAlpaca, and Clip Studio Paint. That mix matters because it shows something useful. Beginners now have both free and paid paths available, instead of one expensive default.
Here's a quick comparison to make that less abstract:
| Software | Cost Model | Best For |
|---|---|---|
| Krita | Free | Learning painting and illustration without paying upfront |
| FireAlpaca | Free | Lightweight drawing practice on a budget |
| Clip Studio Paint | Paid | Comics, illustration, and line work focused workflows |
| Adobe Photoshop | Paid | General creative work, painting, editing, and mixed workflows |
| Adobe Fresco | Paid | Stylus-first sketching and painting |
| Adobe Illustrator | Paid | Vector graphics, logos, and design systems |
If you're curious about AI-connected creative tooling inside Adobe's ecosystem, the Flaex.ai Adobe Firefly profile is a useful overview of where Firefly fits. If you want a more guided look at the same tool in a training context, this Adobe Firefly resource from AI Academy is one option.
Keep your budget tied to your goals
New artists often overspend in the wrong category. They chase premium brushes before they can control line weight. They upgrade hardware before they've developed a daily sketch habit. That usually leads to frustration, not momentum.
Use these filters instead:
- If you want to test the medium first: start with free software and the cheapest hardware that lets you draw comfortably.
- If you already know you like illustration: pay for software with a workflow you enjoy, because interface friction adds up.
- If portability matters most: favor a standalone device, since convenience often beats raw specs for beginners.
- If you're learning for work: pick tools that match your likely output, such as Photoshop for mixed visual tasks or Illustrator for vector assets.
You don't need a perfect kit. You need a stable one. Once drawing becomes routine, your preferences get much clearer.
Mastering the Absolute Fundamentals
Beginners usually assume improvement starts with anatomy, perspective, or fancy brushes. It often starts somewhere less glamorous. It starts with understanding the few digital concepts that keep your work editable.
The first one is layers.
Layers are your safety net
Think of layers like clear sheets stacked on top of each other. One sheet holds the sketch. Another holds the clean lines. Others hold color, shadows, or highlights. Because each part lives separately, you can change one area without damaging the rest.
That's why layers feel like a superpower when you're new. If your line art looks shaky, you can redo only the lines. If the background color feels wrong, you can adjust only the background. Traditional drawing often asks you to commit early. Digital workflows let you stay flexible longer.
A good beginner habit is to name layers plainly. “Sketch.” “Ink.” “Plant color.” “Pot shadow.” That tiny bit of organization prevents the messy file problem that confuses many new artists after only a few sessions.
When your file gets messy, the issue usually isn't creativity. It's layer management.
Brushes matter less than control
Brush settings can become a rabbit hole. Many people download a huge brush pack and then wonder why their art still feels awkward. The answer is usually simple. They haven't yet learned what a small set of brushes can do.
Start with three types:
- A hard round brush for line work, shape drawing, and crisp edges
- A soft round brush for gentle shading and blending
- A textured brush for surfaces that feel less sterile
That's enough to learn pressure control, edge control, and opacity. It also helps you notice something important. A brush doesn't create style by itself. Your decisions do. The same brush can look stiff in one hand and expressive in another.
When a brush feels “bad,” test three things before replacing it. Lower the size, change the opacity, and slow down your stroke. Beginners often blame the tool when speed or hand pressure is the issue.
Color becomes easier with simple constraints
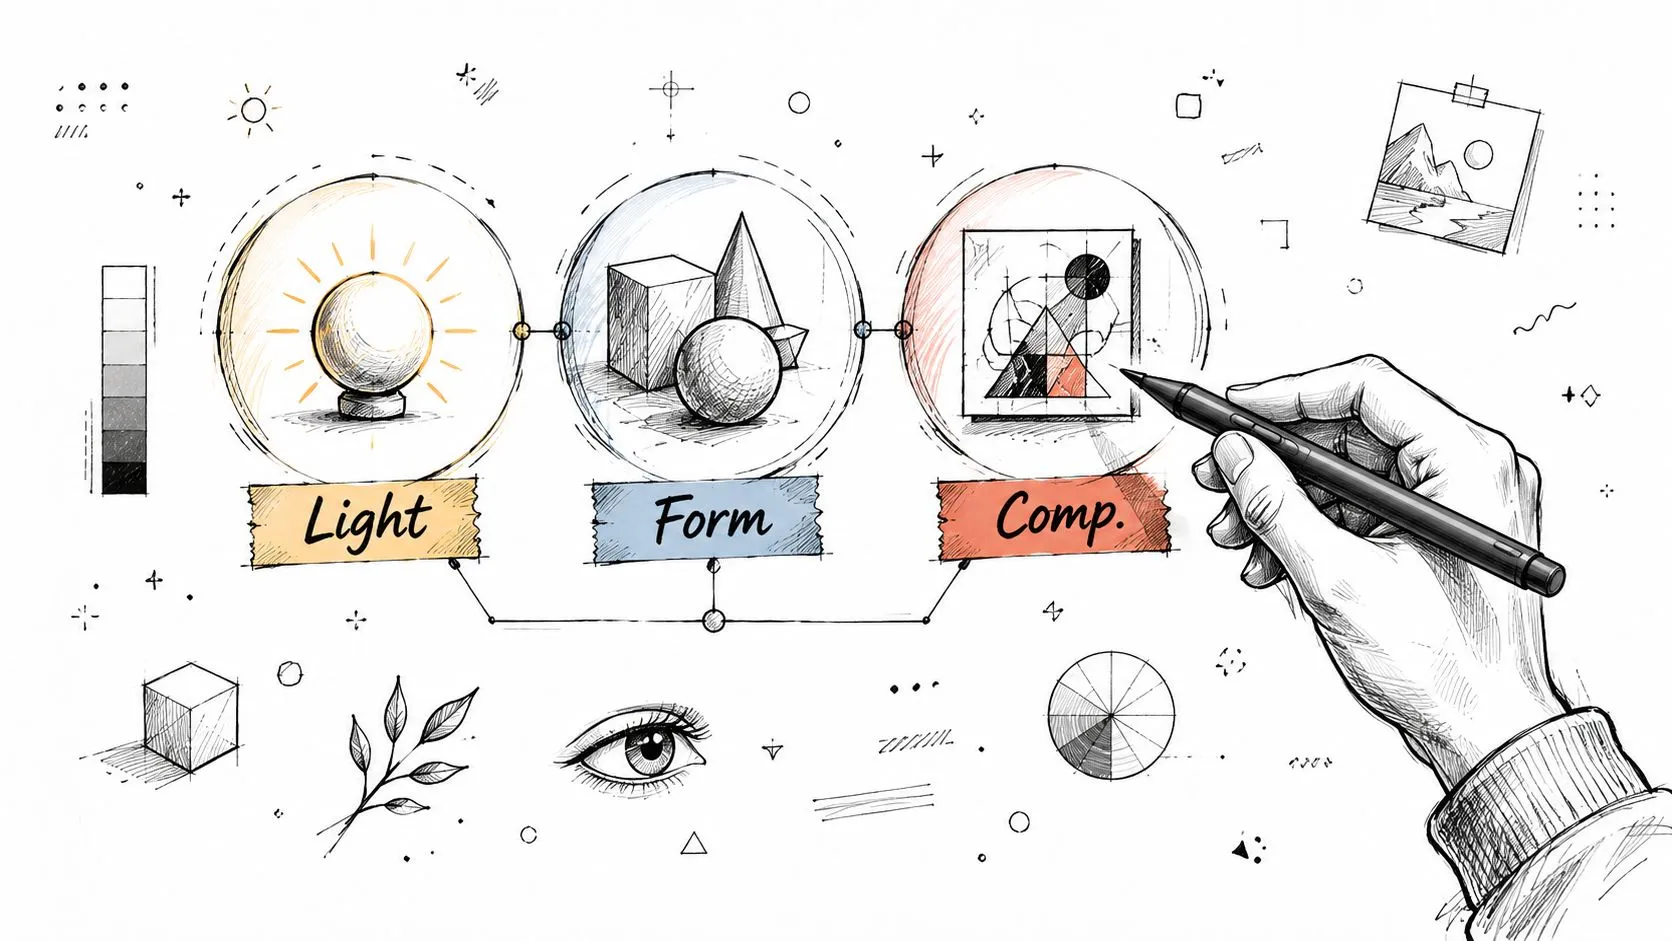
Color theory can sound bigger than it needs to be. You don't have to memorize complex systems to make your first pieces look better. You only need a workable way to choose and compare colors.
One useful place to begin is with Hue, Saturation, and Brightness. Hue is the color family. Saturation is how intense it feels. Brightness is how light or dark it appears. If a piece looks chaotic, the problem is often too many equally intense colors fighting for attention.
Try limiting yourself:
- Pick one main color family for the image mood
- Use one accent color for contrast
- Keep some areas less saturated so focal points stand out
- Shift brightness clearly between light and shadow
A stylized plant is a good example. You might use a muted green for most leaves, a warmer green for highlights, a neutral pot color, and one accent color in the background. That's enough harmony for a beginner piece.
This short demo is worth watching once you start testing these basics in software:
The biggest relief for most beginners is this: you don't need to master every feature in your app. If you understand layers, can control a few brushes, and can choose colors with intention, you can already make solid work.
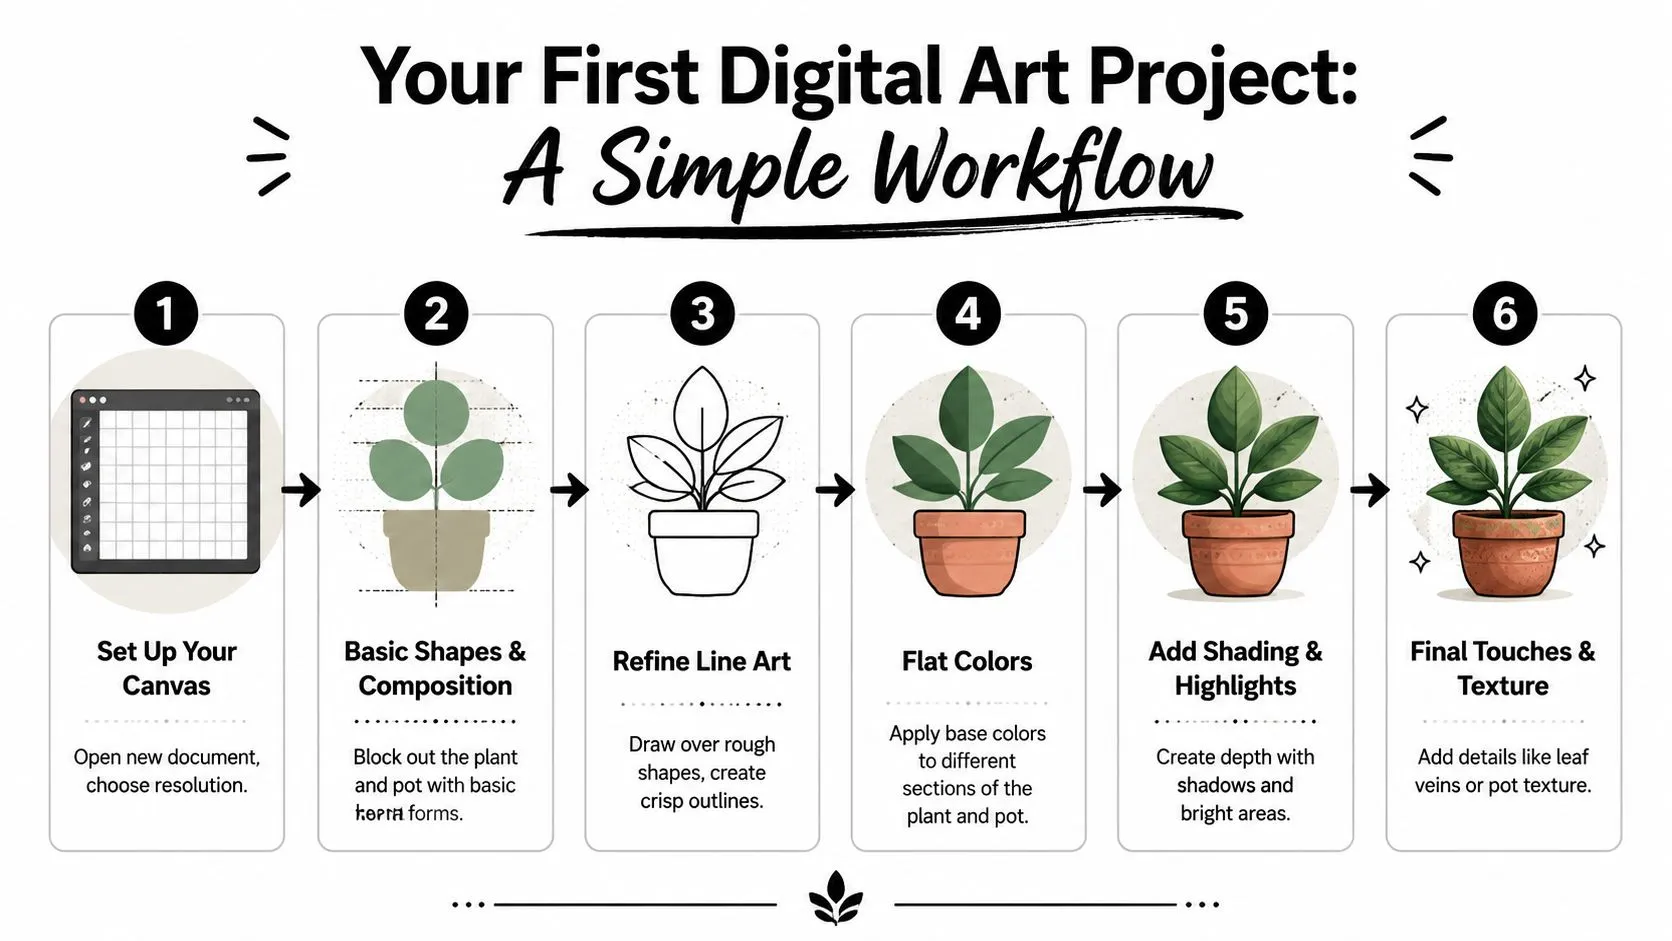
Your First Digital Art Project A Simple Workflow
Your first project shouldn't be a detailed portrait or a cinematic expansive panorama. It should be simple enough that you can finish it. A potted plant works well because it gives you clear shapes, easy color zones, and a chance to practice line art without getting buried in detail.
Set up the file before you draw
File setup sounds boring until it saves a piece from looking blurry later. Clip Studio TIPS recommends at least 300 dpi for print-quality output because lower resolution can look pixelated and blurry when printed, in its guide on canvas size and resolution basics. A beginner tutorial for Procreate also recommends a 3000 × 3000 pixel canvas and notes that it's large enough to print at about letter size in this Procreate beginner canvas walkthrough.
For practice, that size is friendly. It gives you space to zoom in for line work without making the file feel unmanageable.
If you want a beginner-friendly way to experiment with concept variations before drawing the final version yourself, this introduction to Midjourney can help you explore reference directions and mood ideas.
Sketch loosely then clean it up
Start with the simplest possible version of the plant. Draw the pot as a broad container shape. Add the main leaf masses as ovals or long teardrops. Don't worry about elegance yet. You're placing forms.
Then move into the classic layered workflow. A beginner process described in Stray Curls recommends building the piece in separate layers: make a rough sketch, lower its opacity to around 60–80%, trace on a new layer, place major color areas on their own layers, and merge only when the piece is complete in this guide to starting digital art with layers.
That approach matters because it protects you from early commitment. Your rough sketch can stay ugly. It only needs to guide the cleaner layer above it.
A simple pass might look like this:
- Rough sketch layer with messy shapes for the pot and leaves
- Clean line layer above it for clearer edges and overlaps
- Base color layers below the line art for leaves, pot, and background
- Shadow and highlight layers added later for depth
Good beginner habit: Don't merge layers just because the file looks busy. Keep flexibility until the image is finished.
Finish with color light and small details
Once the flat colors are down, add basic light. Pick one light direction and stick to it. If the light comes from the upper left, keep the highlights there and place shadows on the opposite side. Consistency matters more than realism at this stage.
Then add a few details that make the piece feel complete. A small rim on the pot. Veins on a couple of leaves. A cast shadow under the plant. Stop before you start “fixing” everything. Many first pieces get overworked because beginners don't realize the drawing already communicates clearly.
This project gives you more than one finished image. It teaches a sequence you can reuse for icons, simple characters, stickers, and product illustrations. That repeatable sequence is what builds confidence.
How to Use AI Assistants in Your Art Workflow
AI is most useful to beginners when it reduces blank-page stress. It can help you explore options faster, but it can't replace your taste, your hand control, or your judgment. That's why it works best as an assistant.
The bigger constraint for most beginners isn't whether they picked the perfect app. Jenna Rainey notes in her beginner advice on digital art tips and hardware versus skill that many guides focus on software features while beginners are still trying to understand how much device choice matters versus fundamentals. That's the right lens for AI too. Use it to support the fundamentals, not to dodge them.

Use AI for ideation not authorship
A common beginner problem is freezing before the first sketch. You know the broad theme, but not the direction. AI can help you generate a list of ideas so you react to options instead of staring at a blank canvas.
Try prompts like these:
Generate 10 simple illustration ideas for a beginner digital artist around the theme “desk plants.” Keep each concept easy to draw with basic shapes.
Or:
Give me 12 icon concepts for a finance app in a flat illustration style. Keep each one readable at small size.
The “before” state is vague intention. The “after” state is a menu of possibilities you can sketch by hand. If you want more prompt formats for this kind of exploration, this library of AI art prompts for creative experimentation is a practical place to start.
You can also use external tutorials when you want to see how other people structure these workflows. This guide on how to create AI art easily is helpful for understanding the mechanics of prompt-based image generation.
Generate palettes when you feel stuck
Color choice can eat an absurd amount of time. AI is good at narrowing the field. Instead of asking for “a nice palette,” give context, mood, and usage.
For example:
-
Prompt for editorial work:
Give me a 5-color palette for a calm, modern healthcare illustration. Include hex codes and explain which color should be dominant. -
Prompt for character art:
Suggest a muted fantasy palette for a forest mage character. Keep the outfit readable against a dark background. -
Prompt for brand-style visuals:
Create three palette directions for a playful productivity app, one minimal, one warm, one retro.
The key is to treat the result like a draft. You still decide whether those colors support the focal point, read well together, and fit the feeling you want. AI gives options. You make taste-level choices.
Turn finished art into quick mockups
AI offers utility to professionals. If you've drawn a simple illustration, pattern, or icon set, you can place it into a mockup to see how it behaves in context. That's useful for marketers, freelancers, and anyone creating visual assets for work.
A simple prompt structure looks like this:
Place my flat plant illustration onto a clean ceramic mug mockup on a neutral background. Keep the presentation minimal and suitable for a portfolio preview.
Or:
Show my sticker design on a laptop lid in a bright desk scene. Preserve the original artwork proportions.
These mockups don't replace proper product photography or production files. They help you evaluate presentation fast. That matters when you're building confidence, testing a concept, or showing a colleague what your art could become outside the canvas.
Your Digital Art Learning Path from Here
Once you've made a few beginner pieces, the next step isn't “learn everything.” It's choosing a direction. Digital art for beginners gets easier when practice matches the type of work you want to make.
Choose a path that matches your work
If you want to become an illustrator, spend more time on shape design, light, reference use, and eventually anatomy or environments. Your software matters less than your ability to simplify forms and communicate clearly.
If you lean toward graphic design, focus on cleaner edges, layout awareness, typography, and vector tools. You may still sketch digitally, but your real gains come from understanding hierarchy and consistency.
If your role is closer to marketing or content, aim at useful outputs. Social graphics, thumbnail concepts, campaign visuals, product callouts, simple branded illustrations. In that path, speed and adaptability matter as much as drawing polish.
A broader beginner resource on how to create digital art can be useful when you want extra examples of tool choices and creative starting points from another angle.
Your path should change what you practice this week. If it doesn't, it's too vague.
Learn the file basics early
You don't need production-level technical knowledge yet, but a few file habits save headaches.
- JPG works well for simple sharing when you don't need transparency.
- PNG is useful when you want a transparent background.
- PSD or your app's native layered file should be your working file, because it preserves editability.
Pixelation is another common frustration. The fix often starts at canvas setup, not brush choice. Earlier guidance from Clip Studio TIPS recommends at least 300 dpi for print-quality output, and beginner advice commonly points to 2000×2000 pixels or larger when you want room to zoom and preserve detail, as noted in the earlier section.
Build a practice loop you can keep
The most effective learning loop is boring in a good way. Make a small piece. Notice one weakness. Repeat with that weakness in mind. Don't restart your whole identity as an artist every few days.
A steady loop might be:
- Choose one small subject such as a plant, cup, icon, or simple room object
- Set a limited goal such as cleaner lines, better layer organization, or stronger color choices
- Finish the piece anyway even if it isn't impressive
- Save the editable file so you can compare old and new decisions later
That last step matters. Progress becomes visible when you can open an older file and see exactly where your choices have improved.
If you want structured help using AI alongside creative work, AI Academy offers short tutorials, prompt libraries, and practical lessons on tools like ChatGPT, Midjourney, and Adobe Firefly that fit well for non-technical professionals building digital art and visual workflow skills.